Installing the SkyConnect in a Home Assistant VM
I’m gonna be honest, I spent over 4 hours trying (and failing) to get virt-manager installed becasue I was too stubborn to just rebuild my VM.
With that out of the way, here’s the guide! This Guide is for a libvirtd KVM on Ubuntu
First, you are going to want to make a backup of your Home Assistant install and download that somewhere safe (Doesn’t need to be in three places or anything, just somewhere it won’t get deleted).
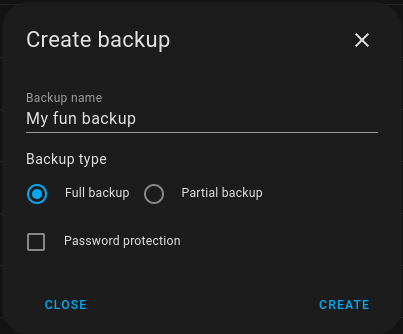
You can do this by going to Settings > System > Backups, then clicking “Create Backup”, give it a name, select “Full backup”, and hit create. This may take a minute or two depending on the size of your install. To download it, click on the backup, select the 3 dots in the bottom right, and press “Download backup”.

Now you are going to open up a terminal on the host machine and enter the command:
sudo virsh list
Now, find the name of your Home Assistnat vm and replace “YOURVM” in the following command with that name.
sudo virsh shutdown YOURVM
Finally, remove the old VM (don’t worry, this won’t delete the .qcow2 file)
sudo virsh undefine YOURVM
Now we’re going to find the address of your SkyConnect using the lsusb command. the output should look something like this:
Bus 002 Device 002: ID 8087:0024 Intel Corp. Integrated Rate Matching Hub
Bus 002 Device 001: ID 1d6b:0002 Linux Foundation 2.0 root hub
Bus 001 Device 004: ID 0624:0249 Avocent Corp. Virtual Keyboard/Mouse
Bus 001 Device 003: ID 413c:a001 Dell Computer Corp. Hub
Bus 001 Device 008: ID 10c4:ea60 Silicon Labs CP210x UART Bridge
Bus 001 Device 002: ID 8087:0024 Intel Corp. Integrated Rate Matching Hub
Bus 001 Device 001: ID 1d6b:0002 Linux Foundation 2.0 root hub
In my case, my skyconnect had the address: 001.008 (this WILL CHANGE when you unplug and replug the skyconnect, so don’t do that!).
Finally, we will recreate the Home Assistant VM (replace /PATH-TO-YOUR-VM.qcow2 with the path to your VM image (this will be a .qcow2 file), and replace XXX.XXX with the address of your SkyConnect):
sudo virt-install --name hass --description "Home Assistant OS" --os-variant=generic --ram=2048 --vcpus=2 --disk /PATH-TO-YOUR-VM.qcow2,bus=sata --graphics none --boot uefi --hostdev XXX.XXX
And that’s it, you’re done! If everything went correctly, you will be able to access your Home Assistant VM at homeassistant.local:8123
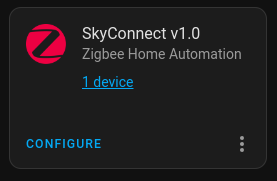
To add your SkyConnet inside of Home Assistant, go to the integrations page, and configure the “SkyConnect v1.0” integration that shows up automatically.
